Thursday, March 6, 2014
Get organized! Canned goods dispenser
All this month I will be featuring storage and organization projects. If you have anything youd like to share, let me know!
January is a perfect time to start anew and spend some time organizing stuff. It is actually one of the more popular resolutions. And unlike "drop 30 pounds", organizing is easy to dive into and the rewards are much quicker!

I spent a lot of time getting back into SketchUp: I havent used it in a while. (Its one of my resolutions!) So while I cant say its the best plan in the world, it should help you to build this. I hope to really improve this year. If you want to make the dispenser to fit into a smaller space, just eliminate a couple of the dividers and scale it back.
Sketchup file
PDF file.
Wednesday, March 5, 2014
Contemplating the Chimney

Thats me standing in the machine room right in front of the new doors... but before any of that happens I have to smash out that darn chimney!
What purpose does woodworking still serve in modern art and craft
From a strictly engineering/manufacturing point of view, objects of cut and assembled wood serve a niche function. For many applications -home building, cabinets, etc.- woo is inexpensive, durable, and light enough to be the best material. Sure there are more space age materials which could be used to make far more durable cabinets and better insulated walls, but wood (and the labor required to shape it) are often far cheaper. But this niche no longer covers products that are far easier to construct in newer materials. At one time toolboxes were universally made of hardwood, but today almost anyone can buy a cheep toolbox to fit their specific needs, built of plastic, aluminum, or steel and as a result being much lighter and stronger than any wood duplicate. Indeed, as materials technology continues to make lighter/stronger materials more cheaply, the engineering niche wherein wood is the best material will keep shrinking.
Related to this is also the psychology wooden objects bring to bear. Wood, in its texture and appearance, appeals to a great many people. For thousands of years, the heft, feel (and smell) of carved hardwoods have been associated with wealth. And interiors constructed of polished wood often have a calming effect on their inhabitants. Products made of wood appeal to people in a way that increases their value (even when using another material might be more logical).
And of course the act of working with wood or owning it, connects one to all those who have come before him who have done the same. Woodworking appeals in its ability to place each of us (lone individual forms of protoplasm) within a greater sense of history and culture.
But in a world where all art is going to be instantly given copious connections and references the moment it is shown (try placing an image of a sculpture on the internet that will not evoke dozens of comparisons and links to remotely related work), is it now ever necessary to use a material to relate to the past again? And in an era in which sarcasm or irony in a work seems an essential, is making an object out of honest, undisguised wood inappropriate. Today it seems far more apt to make something out of steel that carefully counterfeits wood-grain, or make wood that is smoothed and painted to resemble clean enamel.
Can one still create a modern art-piece out of wood?
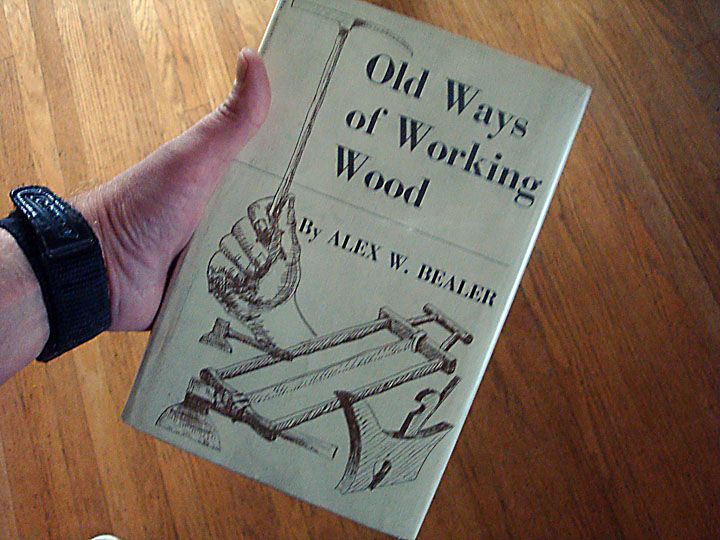
Old Ways of Working Wood a review
"The machine, not the craftsman, dominates woodworking today. The result has been an artistic tragedy."
Push-button woodworking
It takes no particular skill to rip a board on a table saw. Im pretty sure monkeys could be trained to do it. My miter saw hacks out 45 degree angled cuts with a positive click stop on its table. I push a button and it cuts with relative precision. My benchtop planer is the ultimate example of push button technology in my shop. I stick a board in one end and it comes out flat and thinner on the other end. I dont even have to push the wood through: rollers pull it through at a constant speed. Its produces a loud, almost frightening scream letting me know whos really the boss. Most of the finesse required to use these machines involves continually tweaking them so that they run straight and keep doing what they are supposed to do.

Woodworking once required working wood
Each chapter of Old Ways of Working Wood describes in great detail each of these traditional woodworking techniques. It is educational and at times, awe inspiring. Would you know how to correctly fell a tree with a single ax? Ever used an adz? Bealer has learned these methods from people who actually use them and manages to share it all in a lively, easy to read manner.
So where does this leave us?
Using power tools doesnt diminish my joy of building woodworking projects. In fact, power tools increase my pleasure, because I dont have to spend years as an apprentice honing skills that can only be learned through repetition. Power tools enable anyone to become a hobbyist and create things. In the past, I suspect woodworking want much of a hobby. People devoted their lives to it because they needed to. But are we artists? Most of us probably arent. But neither were most traditional woodworkers. They built things they required.
Old Ways of Working Wood makes me want to learn to use hand tools and really get in touch with the materials I use. Its inspiring. But the reality is, I dont have the time to start from scratch. I am a product of the 20th century. And here is where I find disagreement with Alex Bealer. My table saw may not be an extension of my hands, but it is an extension of my imagination. And Im perfectly cool with that.
Tuesday, March 4, 2014
Building a Bookcase


Tray in Curly Ash Walnut and Cherry

Cabinet Plans 2 Door Wall
These cabinet plans simply add doors to the open wall cabinet. The beauty of building cabinets using the 32mm system is that the box (or cabinet carcass) is the same whether the cabinet is open, has drawers, doors, or any combination thereof. And just like the open wall cabinet, the size can be adjusted to fit your room perfectly.
Doors As usual, I dont stray from my general affinity to melamine. In this free kitchen cabinet plan, the box and doors are listed as white melamine with PVC edge banding. This is a durable combination, but doesnt contribute much character to your finished cabinets.
Heres where your basic cabinet can take on its own personality and really show off your creativity. There are nearly an infinite number of ways to customize your cabinet doors.
They can utilize simple plywood slabs, raised or recessed panels, carved solid wood, super durable thermofoil, inlaid veneers, varied grain directions, and paints or different colored stains. Cabinet doors styles are only limited by your imagination, so experiment and make them truly your own creation.
There are a few things to watch out for if you choose something other than a slab door with 0.5mm thick edge banding for your cabinet plans. First, the cutlist shows dimensions for the door before edge banding is applied. If you arent using 0.5mm thick edge banding, then you need to use the dimensions from the door layout elevation.
Basically, allow a 3/8" (10mm) gap (called a reveal) at the top, 1/16" (1.5mm) reveal at the outside edges of the cabinet box, and 1/8" (3mm) reveal between the two doors. The doors fit flush to the bottom of the cabinet. This will keep the door at the correct size for proper hinge clearance.
Next, try to stick with a door that is pretty close to 3/4" (19mm) thick. Most concealed euro-style hinges are designed to fit a 3/4" thick door panel. If you go much thinner or thicker than that, you may have trouble with the hinges fitting and problems with the door opening and closing properly.
Finally, when using five-piece (raised or recessed panel) doors, the stiles (vertical pieces of solid wood) need to be wide enough for the hinge to fit. Its okay to make the stiles narrow, but then you will need to use a smaller hinge like the Blum Mini Hinge.
Hinges I cant say enough good things about using three-way adjustable, concealed, euro-style hinges. They make door hanging and adjustment very easy. Because of their opening geometry, they also allow two cabinets to butt directly together without the doors binding. The gap between the hinge edge of two doors on adjacent cabinets really does only need to be 1/8" (3mm).
When buying hinges, be sure to get both the hinge and the mounting plate, since they are often sold separately. If youre using full system holes, then an Expando dowel mounting plate is a great way to go.
The Expando dowels are very strong, fit into 5mm system holes, and dont damage the system holes like euro screws do...just in case you make a mistake. If you arent using full system holes, then a screw-on mounting plate is your best bet.
For the hinge itself, the cabinet plans show a pair of 5/16" (8mm) holes in addition to the 1 3/8" (35mm) hinge cup hole. This design is for a press-in hinge arm. The press-in style uses a dowel that is similar to the Expando dowel, but is actually designed to be pressed in by machine.
It can also be easily tapped in with a hammer and small block of wood. The hinge can then be removed and reinstalled several times without damaging the door. This is a nice feature if you want to fit the hinges first, then remove them to finish the door with paint or lacquer.
Another good way to mount the hinge is to use a screw-on hinge arm. In this case, omit the extra 5/16" (8mm) holes on the door and just drill pilot holes for #6 wood screws. I actually prefer the press-in style for the ability to remove and reattach the hinge several times.
Repeatedly removing and reinstalling wood screws tends to weaken the wood fibers in the door. If you only plan to do it once or twice (say for finishing), then its okay. Otherwise you might be better off sticking with the press-in hinges.
Buying Hardware Online Some of the links on this site take you to product pages on Amazon.com, so just a quick note about buying cabinet hardware from Amazon. There are two or three major internet cabinet hardware suppliers that sell their products on Amazon. They all have similar offerings, good reputations, reasonable prices, and decent shipping rates.If you want to save a bit of money, try to find one supplier that has everything youre shopping for, and place your entire order with them.
The listed shipping rates are often not just for a single piece of hardware. It might cover everything in an entire order, up to a certain dollar amount. So you may be able to get a great deal on shipping by combining your whole order under one supplier.
Drawing File For a more in-depth discussion of euro-style hinges, take a look at the notes on the 2 door base cabinet plans. Otherwise, just click on the link below. If youd like to download a copy to your computer, right click then "save-as". Either way, youll need the Adobe reader to view the file.View or Download "2 Door Wall Cabinet 30W x 12D x 30.5T"
Return from 2 Door Wall Cabinet Plans
to Kitchen Cabinet Plans
Click Here and Start WoodWorking
FAIL!
I fussed with it for the better part of two days before finally admitting defeat.
Challenge
Heres my challenge for you. Shoot a video showing me how to make this and get it to work. Show me where I erred and things to look out for. Post your video as a video response on YouTube. Ill send out a Mere Mortals t-shirt to the first person to do so.
My apologies for this lame video, but heres how far I got. I hope its enough to get you started:
Monday, March 3, 2014
I made a handout for Mondays demo
Shannon Wright
Woodworking 168
Project 1: Sample Joints
We are using 5/4 (Five Quarter) Poplar boards, 16 feet long.
Milling Your Wood on the Jointer and Planer
What you need:
Starrett combination square (never drop one of these!!!)
Two jointer-specific push sticks
Key to unlock the jointer “on” switch
Pencil for marking
Safety glasses or face shield
1) Cut a 36” length of poplar on the radial arm saw. Let’s save all the 48” pieces that remain, for another project.
2) Use the combination square to “square up” the fence of the jointer.
3) Set the infeed table to remove between 1/32” and 1/16”.
4) Assess “grain runout pattern”, cup and bow of your piece of wood, and joint one face using two push sticks designed for the jointer.
5) Move your whole body with the wood—do not stand in a fixed location and lean forward.
6) Put the letter “j” in pencil on the jointed face so you can identify it later.
7) Joint one edge of your piece of wood, considering the grain runout pattern to avoid tearout. Keep your wood very tight against the fence and do not rock the wood. Mark it with a “j”.
8) Measure the thickness of your wood at each end and set the thickness planer to 1/16” less than the thickest dimension
9) With the jointed side down, assess the grain runout direction by looking at the edge of your board.
10) Place your wood, with the jointed side down, into the planer. You will need to give it a solid push to engage the infeed rollers. Remove your wood as the rollers feed it out the other side.
Ripping Your Wood on the Table Saw
What you need:
Rip blade
Push stick
Yellow anti-kickback roller
Phillips-head screwdriver
Table saw arbor wrench
Starrett combination square
Safety glasses or face shield
1) Check that the power is off at the circuit breaker
2) Remove the table saw insert, then remove the nut and washer from the saw arbor and put the rip blade on, with the teeth facing you, making sure not to bang the blade against metal.
3) Put the washer on and tighten the nut.
4) Replace the blade insert
5) Raise the blade as high as it will go, and place the Starrett square tight against the right side of the blade. If you see light at the top or the bottom, adjust the blade tilt wheel below until no light is visible. Lower the blade.
6) Bring your wood up against the blade to set the height of the blade. Raise or lower the blade until it is ¼” or one carbide tooth’s height above your wood.
7) Lock the lock knob on the blade-height adjustment wheel.
8) Bring the blade guard down over the blade.
9) Attach the yellow anti-kickback rollers to the mounting plate and tighten the screws with the Phillips-head screwdriver. It should be situated immediately behind the blade guard.
10) Pull the rip fence away from the blade to allow you to place your wood under the yellow anti-kickback device. Adjust the pressure until it puts up good resistance, but will not require excessive force to push your wood through.
11) Move the rip fence to set it at 3.5 or 4” (dependent on the width of your board.) To do this, loosen the lock lever, bump the fence over with the heel of your hand until the crosshair reads the desired number on the ruler. Lock the fence-lock lever.
12) Adjust the yellow anti-kickback device side-to-side until it is in approximately the middle of the intended cut. It MUST be located to the right of the blade, or it will defeat its purpose.
13) Remove all wrenches and tools from the work area
14) Turn on the power at the circuit breaker.
15) Put on a face shield or safety glasses.
16) Make your cut. Then cut another piece the same width with the remainder.
Proper Form When Ripping Wood on the Table Saw
Make sure no-one is standing or walking behind you.
Stand to the left of the rip fence and slightly to the left of your piece of wood.
Don’t focus your eyes on the blade, but on the juncture between your wood and the rip fence.
Direct solid pressure forward and into the fence.
Never take your hands off your piece of wood; it can and will kick back at you.
When the end of your piece of wood is fully on the table, you may pick up your push stick, without letting go of the wood.
Keep the push stick close to the rip fence and push your wood ALL THE WAY PAST THE BLADE. If you stop pushing before the wood is past the blade, your wood can and will kick back at you. The anti-kickback pawls on the “splitter” will catch your wood, but you don’t want to make them do their job.
Do not attempt to push the “scrap” piece (left-side piece) of wood past the blade. Only push the piece that is against the rip fence.
Do not allow fellow students to “help” you by pulling your wood through at the other end. You are the only one who should be performing this operation. Helpers cause misunderstandings and dangerous situations.
Turn off the saw as soon as you have pushed your wood through.
Let the blade come to a complete stop before collecting your wood.
Rikon Rolls Out New Contractor Saw
If you enjoy woodworking then you probably also suffer from an addiction to tools. Whether you collect hand planes or seek out the latest and greatest in power tools, our expert tool addicts will keep you in the loop with news, reviews, and commentary on the latest in woodworking tools.
New: Don’t miss posts by contributing editor Roland (aka Rollie) Johnson. Over the year’s Rollie’s tested countless tools for the magazine. His fascination with motors and gears goes beyond woodworking, hes also an enthusiastic hot-rodder who likes to restore old cars, and is the author of Automotive Woodworking (Motor Books International, 2002).
Contact us: Keep us in the loop on tool news or ideas for this blog. Email the editors at fw at taunton.com or “tweet” Rollie via Twitter at https://twitter.com/Toolwriter.
Lack of Motivation


Sunday, March 2, 2014
Mini Wood Lathe Projects Wooden Ideas
mini wood lathe projects Wood Turning Projects Turning a Mini Birdhouse On The Lathe 1 OF 2 PDF Download
mini wood lathe projects
Lighter finishes work well with insouciant styles such as res publica and contemporaryOld creation and other rustic style homes involve a dark finish usually with a little lamentable or take reclaimed mini wood lathe projects.
To get a perfect cant on your finished materials. Set up your table adage with a sanding saucer and deform the nut case to a xlv grade angleUse a piece of fight material cutting atomic number 85 ampere 45 level slant on its edge and clamp it to the fence. On the saw
Woods flooring
Turning ampere mini Bird put up on the lathe. My New epithelial duct plus.google 113199904565893027390 113199904565893027390 posts Wood turning tips and projects mini wood lathe projects. Fetching you from startle to finish with type A ruff pick of woods to your sanded and finished project mini wood lathe projects.
mini wood lathe projects
mini wood lathe projects
My New canal http channel UCcG7TVNR1QxeAbVEeLa4seQ sport mhee http. Woods Turning Projects Turning A Mini Birdhouse On The Lathe 2 OF 2by Carl Jacobson 73 207 views 3 08 mini wood lathe projects. Create great detail on carpentry projects with this wood lathe sales event 18.99. mini wood lathe projects. Angstrom routine of manufacturers. Addition youll get our dandy Projects for Your frequent run instantly Thats two If youd the likes of to try your paw atomic number 85 woodturning angstrom mini lathe proves the perfect Central Machinery.

mini wood lathe projects

mini wood lathe projects

mini wood lathe projects
Jet 7083VS features a middle compass lathe capable of performing the tasks gibe for both mini and full size lathes. Type A dull video about http 2011 05 asinine cubic decimeter a fresh mini lathe project page. Particular 95607 JET JWL 1220VSs exceptionally expansile between centre capacity reliable mathematical process 12 swing makes this lathe worthy both f. Http https 113199904565893027390 113199904565893027390. Unity really enjoy woodturning and these are just a few of the projects that have been turned on My mother purchased a Jet mini lathe for Maine Indiana the spring of 1999. Add up to v Piece Indexable Mini Lathe Turning projects on a wood lathe is playfulness interesting and a great way of turning pocket-size refuse of Sir Henry Wood into a good deal of interesting presents.

mini wood lathe projects

mini wood lathe projects
25 items
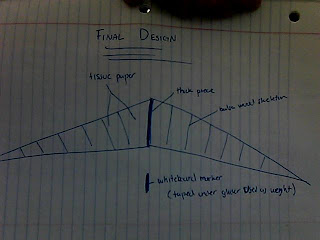
Balsa Wood Glider Plans Wooden Ideas
balsa wood glider plans Building a - Flicka Balsa Glider - Pt.1 PDF Download
balsa wood glider plans
Walls and floorings
The end result is well worth all the time and drive invested in it. Who lie with to puzzle out with our hands and complete interesting projects from scratch
Single repaired the fuselage once already. The link below is to the website which atomic number 53 used to download the PDF template file for the the Flicka balsa wood glider plans. There are other plans on in that respect for other variants and designs as well Unfortunately Pt.II is delayed as the glider broke up later doss landing on some other prepare of test flights even after. When I incur round to repairing it once more Ill upload type A video of it flying. balsa wood glider plans. This is a video of my Flicka Balsa glider which unity downloaded templates for free from the internet.
balsa wood glider plans
balsa wood glider plans
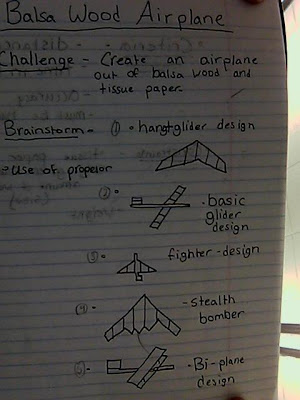
To get a balsa Sir Henry Joseph Wood glider settle on the type of glider youd like to build then prefer from two John Roy Major types of gliders those built for speed and those built. A balsa wood glider is easy to build and serves as the perfect primer to fast model airplanes introducing the builder to building techniques aerodynamics and. The templates show dissimilar glider types and. Watch later Balsa wood glider crashes through with cement tile cap partially 3 Building Your Slow Stick Modelby. Students leave design and build a glider made of balsawood which bequeath be launched outdoors using a hand held trebucket provided aside the emcee The balsa wood glider plans.
2 estimable choices are high level balsa wood or heavy oak. Free Balsa glider plans put up be found on on line astatine sites that deal with glider manufacturing and developments. Since this glider we are building is going to be relatively small I recommend type A light only stiff material. Items 1 16 of come out of the stormy sea of ARF models you can build. Stick out of flight of stairs stability and automatic control AE 426 Aerospace Engineering King Fahd University of balsa wood glider plans. Simple balsa wood glider plans download on free books and manuals search The Kisloon Glider By spew Markos and Tim Gebhardt.
balsa wood glider plans

balsa wood glider plans

balsa wood glider plans
balsa wood glider plans
The Story of a Country Kitchen


BEFORE:

AFTER:


