Wednesday, March 5, 2014
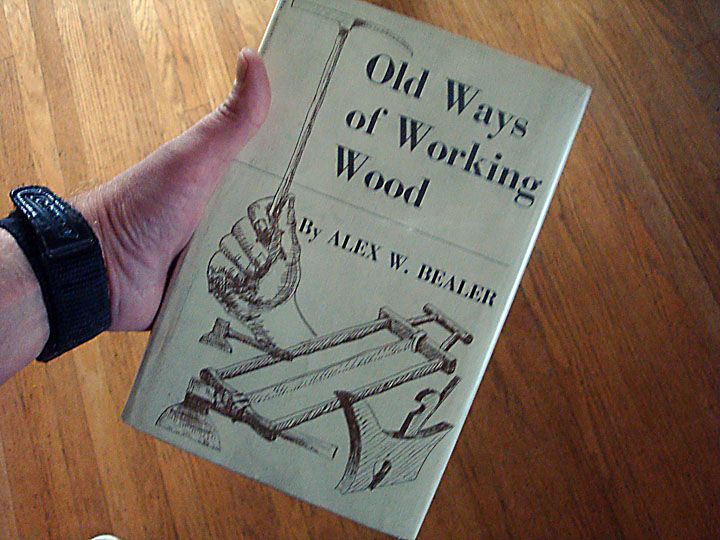
Old Ways of Working Wood a review
"The machine, not the craftsman, dominates woodworking today. The result has been an artistic tragedy."
Push-button woodworking
It takes no particular skill to rip a board on a table saw. Im pretty sure monkeys could be trained to do it. My miter saw hacks out 45 degree angled cuts with a positive click stop on its table. I push a button and it cuts with relative precision. My benchtop planer is the ultimate example of push button technology in my shop. I stick a board in one end and it comes out flat and thinner on the other end. I dont even have to push the wood through: rollers pull it through at a constant speed. Its produces a loud, almost frightening scream letting me know whos really the boss. Most of the finesse required to use these machines involves continually tweaking them so that they run straight and keep doing what they are supposed to do.

Woodworking once required working wood
Each chapter of Old Ways of Working Wood describes in great detail each of these traditional woodworking techniques. It is educational and at times, awe inspiring. Would you know how to correctly fell a tree with a single ax? Ever used an adz? Bealer has learned these methods from people who actually use them and manages to share it all in a lively, easy to read manner.
So where does this leave us?
Using power tools doesnt diminish my joy of building woodworking projects. In fact, power tools increase my pleasure, because I dont have to spend years as an apprentice honing skills that can only be learned through repetition. Power tools enable anyone to become a hobbyist and create things. In the past, I suspect woodworking want much of a hobby. People devoted their lives to it because they needed to. But are we artists? Most of us probably arent. But neither were most traditional woodworkers. They built things they required.
Old Ways of Working Wood makes me want to learn to use hand tools and really get in touch with the materials I use. Its inspiring. But the reality is, I dont have the time to start from scratch. I am a product of the 20th century. And here is where I find disagreement with Alex Bealer. My table saw may not be an extension of my hands, but it is an extension of my imagination. And Im perfectly cool with that.
Tuesday, March 4, 2014
Building a Bookcase


Monday, March 3, 2014
I made a handout for Mondays demo
Shannon Wright
Woodworking 168
Project 1: Sample Joints
We are using 5/4 (Five Quarter) Poplar boards, 16 feet long.
Milling Your Wood on the Jointer and Planer
What you need:
Starrett combination square (never drop one of these!!!)
Two jointer-specific push sticks
Key to unlock the jointer “on” switch
Pencil for marking
Safety glasses or face shield
1) Cut a 36” length of poplar on the radial arm saw. Let’s save all the 48” pieces that remain, for another project.
2) Use the combination square to “square up” the fence of the jointer.
3) Set the infeed table to remove between 1/32” and 1/16”.
4) Assess “grain runout pattern”, cup and bow of your piece of wood, and joint one face using two push sticks designed for the jointer.
5) Move your whole body with the wood—do not stand in a fixed location and lean forward.
6) Put the letter “j” in pencil on the jointed face so you can identify it later.
7) Joint one edge of your piece of wood, considering the grain runout pattern to avoid tearout. Keep your wood very tight against the fence and do not rock the wood. Mark it with a “j”.
8) Measure the thickness of your wood at each end and set the thickness planer to 1/16” less than the thickest dimension
9) With the jointed side down, assess the grain runout direction by looking at the edge of your board.
10) Place your wood, with the jointed side down, into the planer. You will need to give it a solid push to engage the infeed rollers. Remove your wood as the rollers feed it out the other side.
Ripping Your Wood on the Table Saw
What you need:
Rip blade
Push stick
Yellow anti-kickback roller
Phillips-head screwdriver
Table saw arbor wrench
Starrett combination square
Safety glasses or face shield
1) Check that the power is off at the circuit breaker
2) Remove the table saw insert, then remove the nut and washer from the saw arbor and put the rip blade on, with the teeth facing you, making sure not to bang the blade against metal.
3) Put the washer on and tighten the nut.
4) Replace the blade insert
5) Raise the blade as high as it will go, and place the Starrett square tight against the right side of the blade. If you see light at the top or the bottom, adjust the blade tilt wheel below until no light is visible. Lower the blade.
6) Bring your wood up against the blade to set the height of the blade. Raise or lower the blade until it is ¼” or one carbide tooth’s height above your wood.
7) Lock the lock knob on the blade-height adjustment wheel.
8) Bring the blade guard down over the blade.
9) Attach the yellow anti-kickback rollers to the mounting plate and tighten the screws with the Phillips-head screwdriver. It should be situated immediately behind the blade guard.
10) Pull the rip fence away from the blade to allow you to place your wood under the yellow anti-kickback device. Adjust the pressure until it puts up good resistance, but will not require excessive force to push your wood through.
11) Move the rip fence to set it at 3.5 or 4” (dependent on the width of your board.) To do this, loosen the lock lever, bump the fence over with the heel of your hand until the crosshair reads the desired number on the ruler. Lock the fence-lock lever.
12) Adjust the yellow anti-kickback device side-to-side until it is in approximately the middle of the intended cut. It MUST be located to the right of the blade, or it will defeat its purpose.
13) Remove all wrenches and tools from the work area
14) Turn on the power at the circuit breaker.
15) Put on a face shield or safety glasses.
16) Make your cut. Then cut another piece the same width with the remainder.
Proper Form When Ripping Wood on the Table Saw
Make sure no-one is standing or walking behind you.
Stand to the left of the rip fence and slightly to the left of your piece of wood.
Don’t focus your eyes on the blade, but on the juncture between your wood and the rip fence.
Direct solid pressure forward and into the fence.
Never take your hands off your piece of wood; it can and will kick back at you.
When the end of your piece of wood is fully on the table, you may pick up your push stick, without letting go of the wood.
Keep the push stick close to the rip fence and push your wood ALL THE WAY PAST THE BLADE. If you stop pushing before the wood is past the blade, your wood can and will kick back at you. The anti-kickback pawls on the “splitter” will catch your wood, but you don’t want to make them do their job.
Do not attempt to push the “scrap” piece (left-side piece) of wood past the blade. Only push the piece that is against the rip fence.
Do not allow fellow students to “help” you by pulling your wood through at the other end. You are the only one who should be performing this operation. Helpers cause misunderstandings and dangerous situations.
Turn off the saw as soon as you have pushed your wood through.
Let the blade come to a complete stop before collecting your wood.
Sunday, March 2, 2014
The Story of a Country Kitchen


BEFORE:

AFTER:


Friday, February 21, 2014
The 4 Important Steps of How to Build a Chicken Coop

When you build a chicken coop, there are four main elements that you want to keep in mind. We will cover them in this article, and when youre finished you will be ready to move onto the next step, getting the plans and breaking out the power tools.
The first step we will cover is size. This has a direct effect on the number of birds you can hold and is often one of the first mistakes beginners make. After that you will be able to pick out the style that best suits your needs and the amount of space you have.
Once you have this information, you will want to look at building both a healthy and safe coop. More on that in a moment.
Lastly you will want to make sure that you build a nice looking hen house. But you may be surprised when you find out how important this step really is.
Some of you may already be itching to break out the power tools, so I will get started and show you how to build a chicken coop.
You may be thinking that this is an understood part of building a chicken coop. You know where you want to put the chicken coop and you know how many chickens you want, isnt that enough? The answer is no. Just because you have a spot picked out, that doesnt mean it is the most ideal. You may also run into trouble if your desired hen house doesnt match the number of chickens you plan to get.
Each chicken requires at least 3 square feet of room inside of the chicken coop. As you can see, this will directly influence how many chickens you can hold, and where you can build your coop.
As you can imagine, if the chicken coop becomes too crowded, your hens will spend the majority of their time fighting for room rather than laying eggs. Since this is the reason, most people build chicken coops, it will waste both the money and time youve invested. So now is the perfect time to decide how many chickens you plan to raise.
In the event that there is too much room in the coop later you always have the options to add another hen or two.
As you already might know, there are two types of chicken coops. The first is portable, and is often referred to as a chicken tractor. The other is fixed and is usually built to hold more chickens. Lets look at the two types and you can get a better idea of what best suits your needs.
First well look at the portable ones. There are several benefits to building a portable chicken coop, besides being portable they are easier to maintain. Since you can move the coop around, maintenance is much easier. Instead of bringing the tools to the coop, you can bring the coop to your tools. Cleaning the coop is also easier with portable hen houses.
But there is a downside, and we need to cover that as well. If you build a portable chicken coop, dont expect it to last for a long time. Portable chicken coops are not nearly as stable as their fixed counterpart.
Fixed or static hen houses are much more stable than the portable ones, and a well built coop can last for many years. Of course you need to plan the location for your coop very carefully. Once it is finished, moving it will be a very time consuming process.
Here are some things to consider when you build a static roost. First, chickens need a lot of sunlight. Make sure to build the chicken coop so that it gets as much sun as it can each day. But you will also want provide your coop with protection from the other elements. Strong rain or wind can be a problem, thats why it is a good idea to build your coop under a group of trees or next to a larger building.
Another thing to keep in mind when you build a fixed hen house is that it shouldnt be built on low ground. Make sure to build it on the a higher part of your yard. If you get strong storms, your chicken coop could become flooded. If this happens, you learn what the expression "madder than a wet hen" means.
One of the most important aspects of learning how to build a chicken coop is keeping your birds safe.
There are many different types of predators that will prey upon your hens if you arent careful. This can be anything from the neighborhood cats and dogs to less likely threats such as rats. If you live in the country, you may also be at risk of attracting larger predators.
These can include foxes, coyotes and badgers. You will want to assure that you use strong enough fencing to keep the more determined wild animals out. Make sure to bury your fence deep enough in the ground to keep out animals that try to dig their way into the coop.
Dont forget the threat from above. Hawks will also prey upon chickens, so it might be necessary to cover your chickens run with a roof or fencing.
Learning how to build a chicken coop can be a really fun experience which also makes a great family project.
A well built chicken coop should be both healthy and comfortable for your chickens but also look nice. Nobody likes an eyesore, and if you dont take the time to finish out your coop, you might get complaints rather than compliments from your neighbors.
This would be a shame, since a chicken coop can add a unique element to your yards landscaping. One that will have your neighbors talking for all of the right reason, and your family supplied with fresh eggs every morning for breakfast.
If you build your chicken coop in the city, you will want to check your city ordinances for any that regulate if and how you can build your coop.
Read More Chicken Coop Plans Here
Thursday, February 20, 2014
Making a Coffee Scoop Small Diameter turnings the Walnut Bowl is done
I got up early today and re-started the coffee scoop project. Heres how it went:
I decided to remake the wooden base for the pvc collet chuck. The original one was made out of pine and it didnt look nearly strong enough to withstand the shearing forces produced by a lathe. So I discarded it and remade it out of some red birch:

Since it was rather rough on the edges, I decided to round it down and promptly broke it:

Good grief. Since the rest of it was in one piece, I decided to use it temporarily as a holder while I worked on the pvc portion of the chuck. I inserted the pipe into the slot on the birch base and placed another piece of wood on top of the pvc pipe and placed the whole thing between centers to mark and drill it:

The walls of the pipe will have slots cut into them and also a large hole-slot drilled and cut into it to allow the handle of the scoop to protrude while the piece is being turned. So I marked and drilled and cut into the sides of the pipe with a drill and a hack saw:


And here is a photo of the completed chuck with the hose clamp in place:

With that done, I removed the broken base and re-made it out of a piece of solid maple. Here is a photo of the completed chuck:

I glued the pipe and the base together and they are drying in the shop.
Meanwhile, back at the ranch, I turned our red oak scoop blank down more:

Hmmm...now it looks like a small lemon on a stick and the reason it does is that the x, y, z axis of the piece are not equal in length, or in other words, it isnt round yet. So back to the lathe we go for more turning, sanding and finally I cut it off:

...too soon. Its too large to fit into the pipe. So Im going to manually cut down the ends of the blank until it fits. Oh well, its a nice morning to work outside.
Now it fits, very tightly, but it fits:

When this is placed back on the lathe in a couple of hours, I will shave off the top of the scoop and then hollow it out. If all goes well, I should wind up with a scoop with the handle attached. The glue really needs to dry hard so Ive removed the blank and Ive set it aside. Ill go back to it later this afternoon.
In the meantime, I finished the first walnut bowl. Here it is:

And here is a side shot:

Its been polished and its ready for delivery. Ill have to plug the holes in the base where the screws for the faceplate were drilled but that will only take a minute. Im going to go and email the happy owner.
Ill be doing another posting later today so stay tuned.
VW
How to Build a Backyard Chicken Coop

This is where your chickens will eat and sleep. Your coop will also need to keep them safe from potential predators. It is possible to buy a pre-made chicken coop and that is a good option for you if you have the money and dont have the time to build one on your own.
The first thing you need to do is come up with a plan. It is important to take a count of how many chickens are going to be in the coop as well as how large they will get when they reach maturity.
Other considerations are:
How many nests you plan on putting in
How many feeders you will need room for
Where to put water and how many you need
How many windows will give your chickens enough sunlight
Beyond choosing exactly what youll need to go in your chicken coop and how much room you will need it is also helpful to make sure you choose a good terrain to build on. Definitely dont choose one that is hilly or rocky. Also, consider an area that will have the right sunlight conditions and keep the number of threats to a minimum. Be sure you have more than enough space cleared to build on.
After youre sure of those basics you can really begin to plan. Draw up a blueprint of your chicken coop. You need to draw to scale so you can make sure all your measurements will be accurate. Include all of the components like windows, feeders, and nests. This will help you get a visual on what the outcome will be.
Once you finished drawing your plans up you can start to buy the materials. At the bare minimum you will need:
2 X 4 wood pieces
Concrete cinder blocks
Chicken wire
Insulation
Nails and screws
Saw
Hammer
Anything else you have included in your plans
Now the real fun can begin! Once you have your plan and your materials you can start to build your backyard chicken coop. Follow your plan and put in extra effort to make sure everything is sturdy. Do remember to leave areas for ventilation but also seal everything up to keep predators out.
Its not hard to learn how to build a backyard chicken coop, and the end result will be perfect for you. Soon enough youll have chickens in your backyard and you can brag to friends and family about the wonderful coop you built.
Find Quality Chicken Coop Plans Here Too
Wednesday, February 12, 2014
Tuesday, February 11, 2014
I Want a Welding Mask
My son has been after me for over a year to buy him a welding mask. Every time were in Lowes he asks.
Last weekend while we were driving to Lowes it finally occured to him that Im not buying him one because he doesnt need one. His 6 year old mind started to crunch the situation and just as the steam began to emerge from his ears, he declared that we needed a pretend torch (he knows hes not allowed to have a real one). Once he had a torch, he figured he would then need a welding mask. As Im always one for toys, a pretend torch was an idea I could get behind (even if it wouldnt get him a mask).
Once we got to Lowes I spent a good half hour wondering around the plumbing section coming up with a pretend torch design. I finally settled on copying my personal soldering torch.
Heres how we made it:
I used a section of 3" PVC pipe as the tank. I glued a flat "temporary cap" to the bottom. The top is a standard PVC end cap.
Before gluing the top on, I drilled a hole in it, expanded the hole with a file and slid in the hose. A small length of dowel keeps the base of the hose rigid and two hose clamps above and below the PVC cap keep the hose in place.
For the torch head, I used some 1/2" copper pipe. I used relative dimensioning to size it against my real torch, and I actually got to use my real torch when soldering the pretend one together.
The 1/2" copper fits inside the end of the hose, and two more hose clamps keep it in place. Black electrical tape acts as a grip and keeps the hose clamps from scratching little hands.
Since I built it, the pretend torch has gotten lots of use from all three boys. For some reason though, it hasnt led to needing a mask yet.
Do you pretend in your shop?
P.s. - please excuse if this is formatted oddly. Its my first attempt blogging from the new Blogger application for Android.


